Venomous Abyss November 5 Hotfixes: Heroic and Mythic
Smaller Blood Venom pools affect Heroic and Mythic. Other November 5 raid nerfs have narrower scope. Check the exact mode before changing your next pull.
 WoW AuditorGuides
Plan the Lost Explorers on Heroic: fish delivery, crate duty, mushroom timing, three soak groups, Frostfire cleanup and balanced kills.
Prepare a fish carrier and a backup, feed each explorer only once before Mor'zahi finishes Final Ascension, handle the chosen ultimate, and bring all three health bars down together. Never stack all three explorers.
The Lost Explorers becomes manageable when the raid knows what the next fish is buying. It is not merely an emergency interrupt: it resets Mor'zahi's energy and chooses the next explorer's empowered ability. The carrier needs a delivery plan, and everyone else needs the response ready before the fish is used.
This guide covers Heroic, Retail Midnight 12.1.5, checked on 4 November 2026. Mechanics were compared with Wowhead's ability reference, Icy Veins' raid breakdown and Method's Heroic guide. The assignments are suggested tactics; different feed orders are possible.
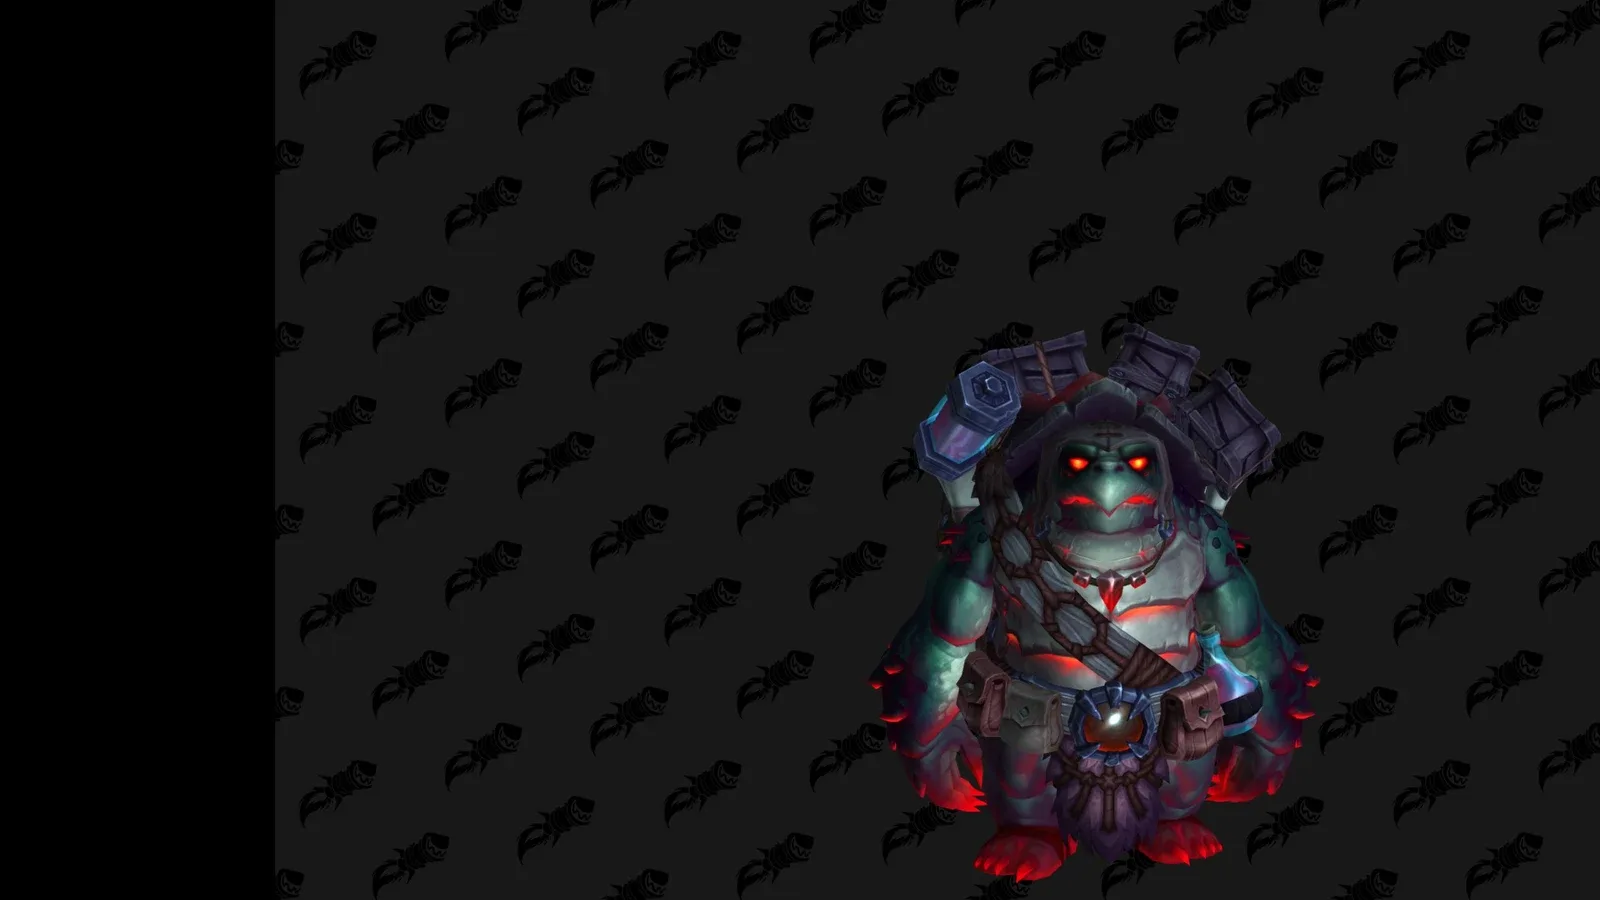
Cover: authentic game model of Trader Gebbo, viewed in Wowhead’s 3D viewer; © Blizzard Entertainment. This is a model reference, not a combat screenshot. Spell icons are Blizzard game assets, identified through the linked Wowhead records.
Ability names below are searchable English references. Open the linked Wowhead spell for its database entry; follow the Heroic instructions here rather than another difficulty’s default tooltip.
Throw Junk — Split crate breaking across players; confirm who has the fish.
Explosive Surprise — Place bombs away from mushrooms; use a mushroom when Blast Wave arrives.
Mighty Thud — Cover all three marked impacts with distinct groups; leave Aftershock afterward.
Frostfire Volley — Spread impacts, then remove fire in Frost Patch and frost in Fire Patch.
Icebound Flames — Use the interrupt rotation; dispel the lingering effect if a cast gets through.
T = tank; H = healer; R = assigned player/group. Arrows show movement or sequence; dots represent players or objects as described in the caption. Schematic, not to scale or a map of the actual arena. English labels match the linked abilities.
A clear starting order is Trader Gebbo → First Mate Nama → Scrollsage Iku. It gives the raid a known sequence of bomb movement, shared leaps and elemental cleanup. It is not a compulsory order: change it deliberately if another sequence suits your group better.
Assign a crate team, one fish carrier with a backup, an interrupt rotation on Iku and three soak groups for Nama. Plan Bloodlust/Heroism on the pull as an opening strategy. Tanks should keep two explorers available for cleave while avoiding United Defense: grouping all three within 30 yards gives them heavy damage reduction. Account for Gebbo's movement and Iku's teleports when repositioning Nama.
Walk over Throw Junk crates to break them and find Grab Fish. Splinters stacks a bleed on crate breakers on Heroic, so share the job and tell healers when someone needs support. Do not let unhandled crates sit until Relic Rupture punishes the raid.
The carrier announces that the fish is collected, identifies the intended explorer, moves into melee range and uses the extra-action button. A target around 90–95 Mor'zahi energy is a conservative delivery plan, leaving movement margin before Final Ascension completes. Confirm the reset actually happened; “I pressed it” is not the same as a successful feed.
Diagram · Throw Junk
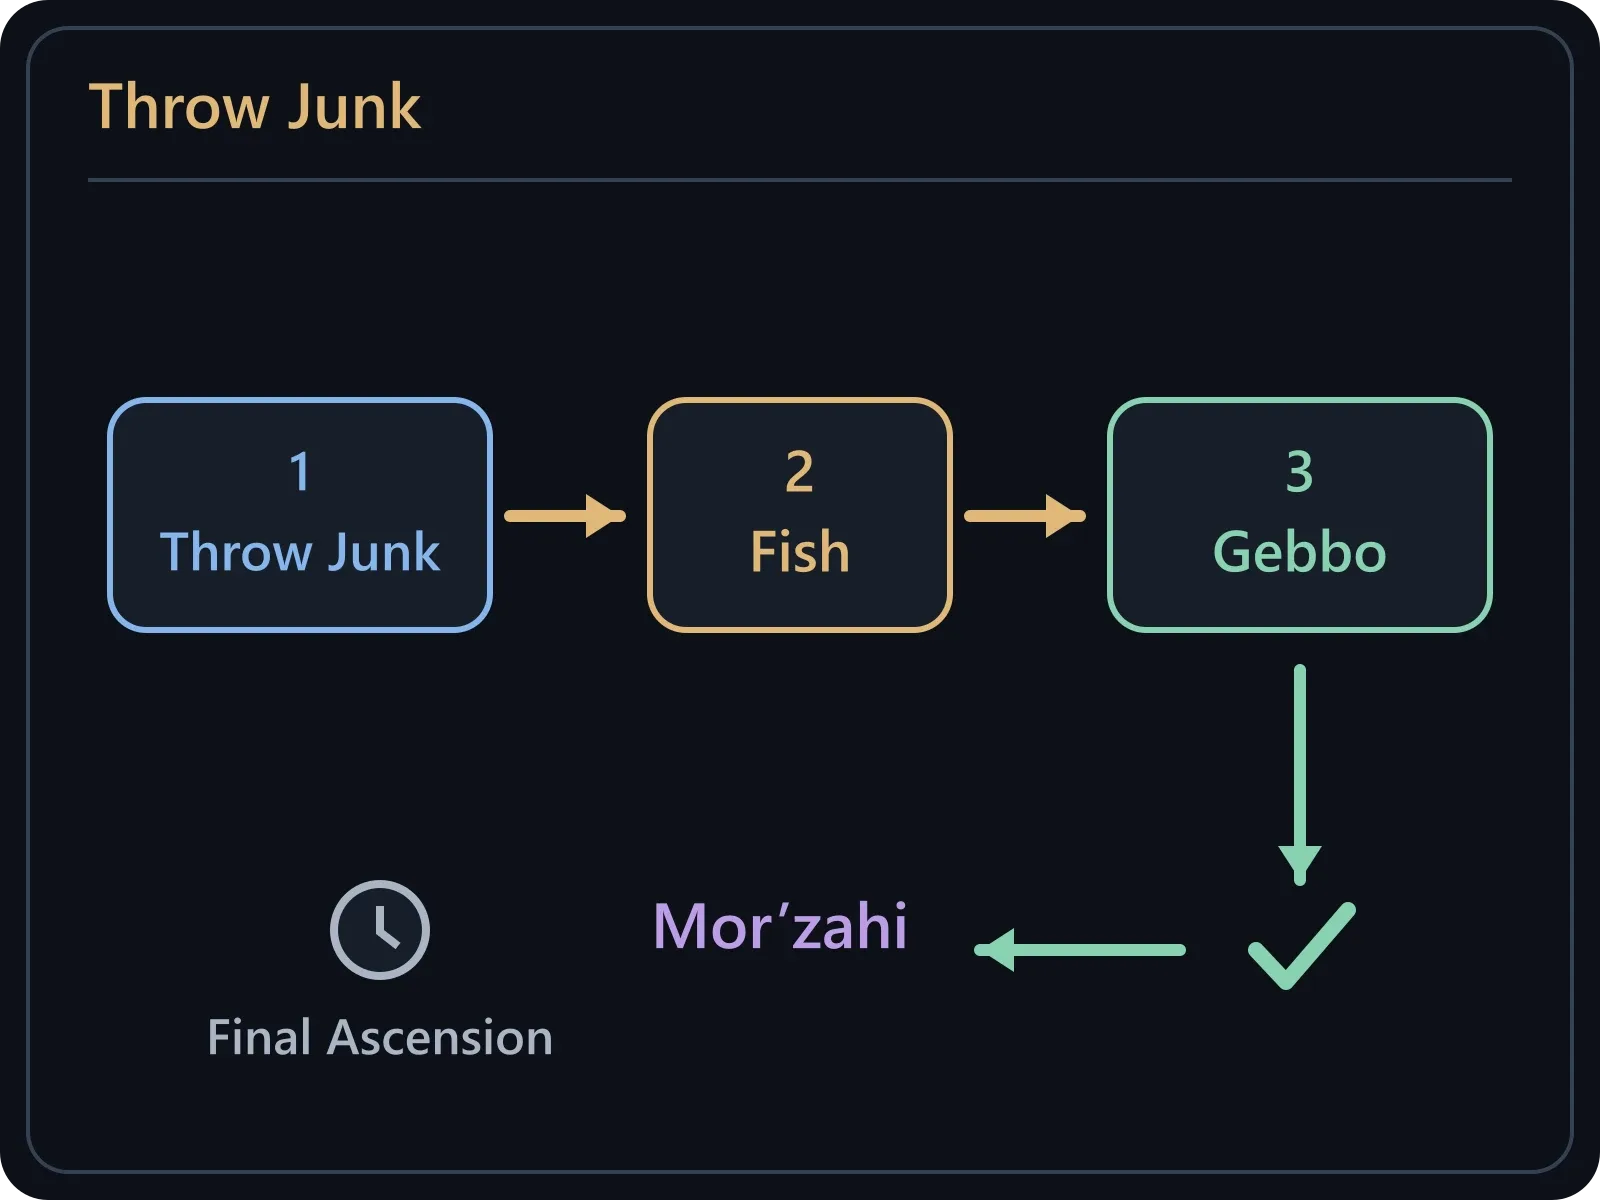
Gebbo is an example feed target, not a mandatory first choice. Confirm the intended explorer’s energy reset and Mor’zahi’s resulting vulnerability; a fish in someone’s bag is not completion.
Each explorer can be fed only once, giving three resets. After those, there is no fourth unused explorer to buy another cycle. Feeding also triggers Fishy Feedback raid damage, so warn healers before the handover rather than overlapping it unnecessarily with another major hit.
Place each Explosive Surprise bomb near the edge, away from the group's available mushrooms. Identify your route to a Bouncy Mushroom before the bomb detonates. When Blast Wave approaches, trigger the mushroom to pass over the ring.
Do not walk over mushrooms early just to practise the bounce: their usable window is brief once activated. After landing, leave the mushroom's burst area and prepare for any following bomb. A movement ability is not automatically a reliable replacement for the bounce; use a class-specific alternative only if its interaction is confirmed.
For Mighty Thud, place the three marked players at distinct, non-overlapping locations, for example one near melee and two farther out. Each preassigned group joins its marked player to split the leap's Physical damage. An empty impact punishes the whole raid.
Watch the knockback and leave the Aftershock ground after each landing. Repeat the assignment for subsequent leap sets. If a marked player is moving unexpectedly, call the mark and its new location; sending all three groups to follow the same player leaves another impact uncovered.
Spread Frostfire Volley circles so their impacts do not overlap. Each affected player drops a matching elemental patch and receives Burning Flames or Piercing Frost. After the impact, clear fire in a Frost Patch, and frost in a Fire Patch.
Diagram · Frostfire Volley
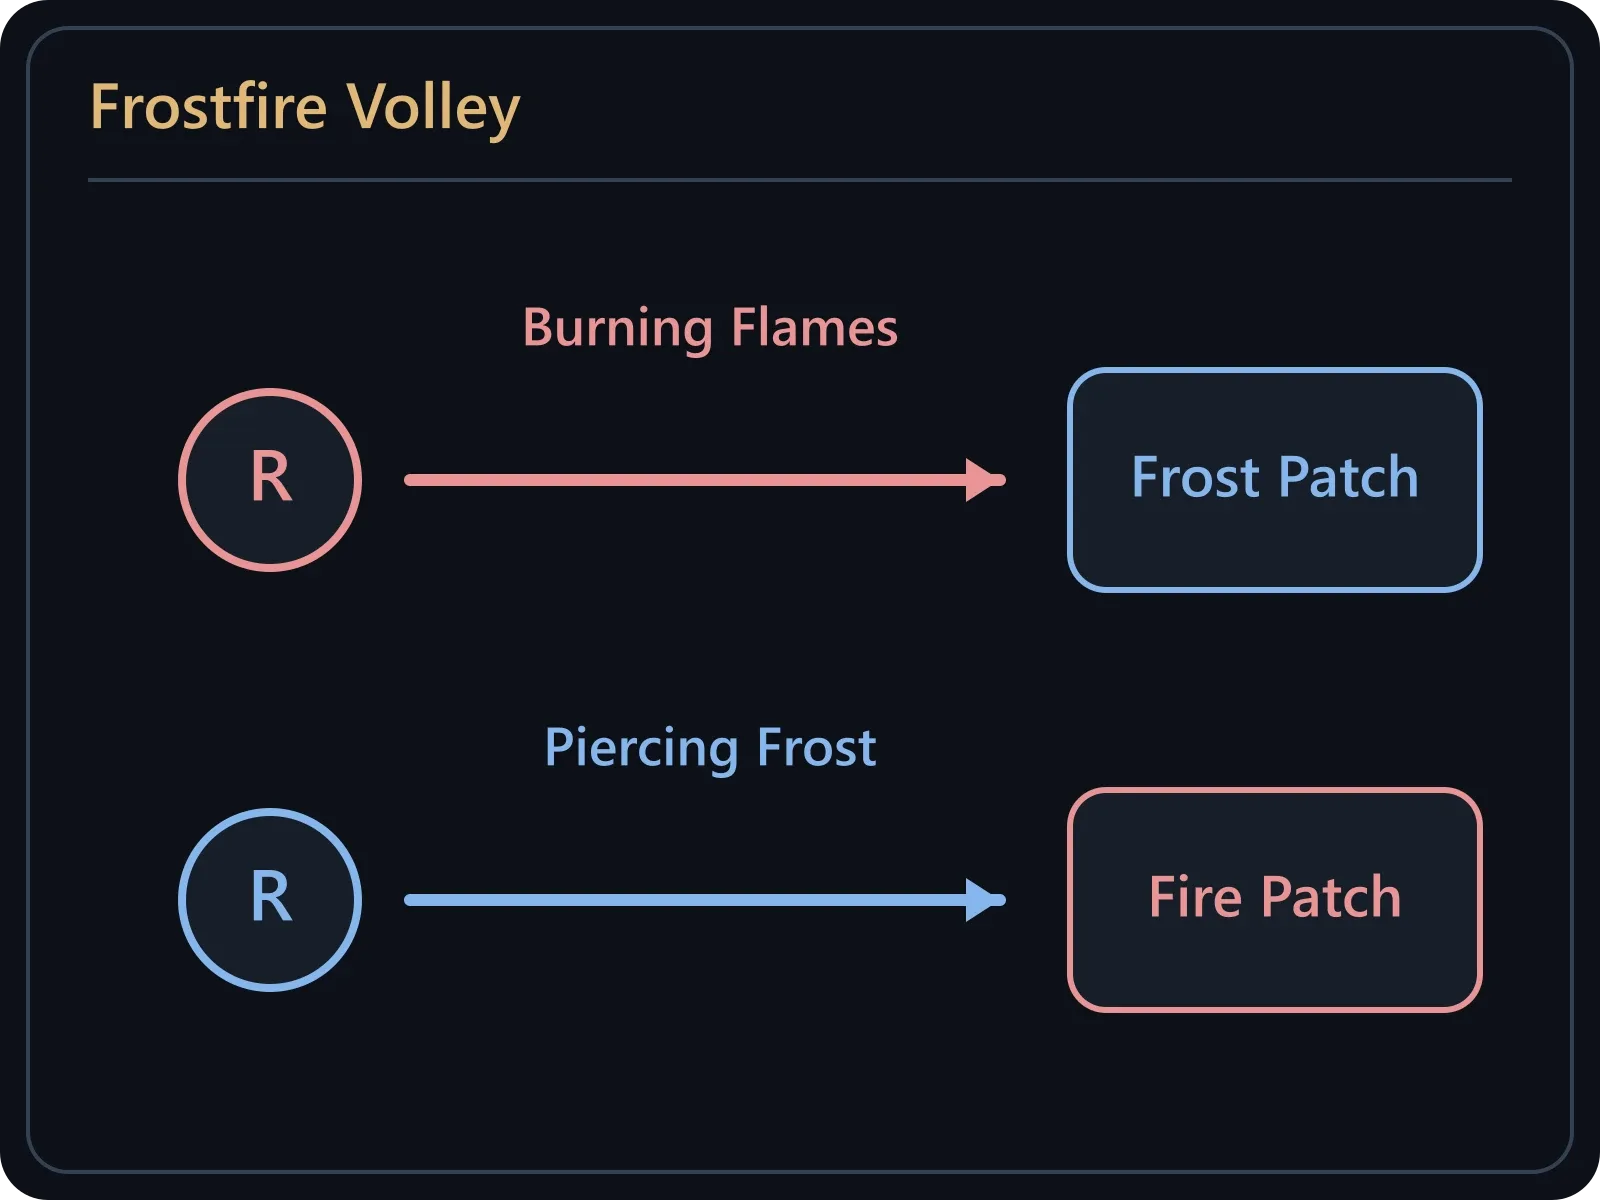
Spread impacts, then remove fire in Frost Patch and frost in Fire Patch.
Clear the old effect before the next volley can hit you and trigger Elemental Explosion. Coordinate cleanup with healing, since clearing patches also creates raid damage; stagger it where the available window permits, without carrying an old effect into the next impacts. Calling “fire clear” before the effect has actually disappeared can send the next player into an unavailable patch.
Interrupt Icebound Flames; healers dispel its lingering effect if a cast gets through. A Blink Nova target moves away from the raid to reduce distance-based damage and avoid teleporting Iku into an unwanted three-boss stack. Melee bait Shell Spin toward the outside, then step out of its shell paths. Everyone dodges Evil Eyes impact zones.
Tanks exchange Iku after Shredding Shards and manage Nama's growing Steady Strikes pressure with mitigation and coordinated swaps. Healers cover the ongoing Malevolent Presence damage as well as the crate team and fish handovers. These tasks do not pause just because an ultimate has ended.
The explorers have separate health bars and become more dangerous when an ally dies. Keep checking all three, reduce damage on the one already ahead and bring the remaining health down together. A long gap between deaths can turn a controlled fight into a healing and tank crisis.
Before a finishing call, check which fish feeds remain, whether the next mandatory mechanic is covered and who still owns interrupts. If a pull fails, first distinguish a late delivery, an unprepared ultimate and an early isolated kill. They require different corrections; adding damage to the same target does not solve all three.
Smaller Blood Venom pools affect Heroic and Mythic. Other November 5 raid nerfs have narrower scope. Check the exact mode before changing your next pull.
Blizzard lists three level-60 Forever raids for December 9. Compare the 10/20/40-player formats and prepare each player’s Onyxia entry before booking a run.
Prepare a better Midnight raid night: choose a realistic goal, cover boss jobs and backups, brief clearly, and turn wipe reviews into one useful change.