Venomous Abyss November 5 Hotfixes: Heroic and Mythic
Smaller Blood Venom pools affect Heroic and Mythic. Other November 5 raid nerfs have narrower scope. Check the exact mode before changing your next pull.
 WoW AuditorGuides
A Heroic plan for Sszorak: read the attack combo, alternate Mutilate groups, place cysts for three gales and pair Crosswinds safely.
Separate Ravage from the raid, alternate two Mutilate groups, place cysts opposite the indicated wind tunnels and preserve them. During the intermission, stay together so each cyst sends the raid back toward the centre.
Sszorak's intermission is prepared before it begins. The wind sequence is visible in advance, and Venomous Surge supplies the cysts that make it survivable. A player who leaves a cyst in a convenient but unrelated corner has not completed the mechanic; the group needs that cyst in the path of a later gale.
This guide covers Heroic, Retail Midnight 12.1.5, checked on 4 November 2026. It compares Wowhead's live ability reference, Icy Veins' role guide and Method's Heroic breakdown. The suggested assignments do not depend on a fixed 20-player roster.
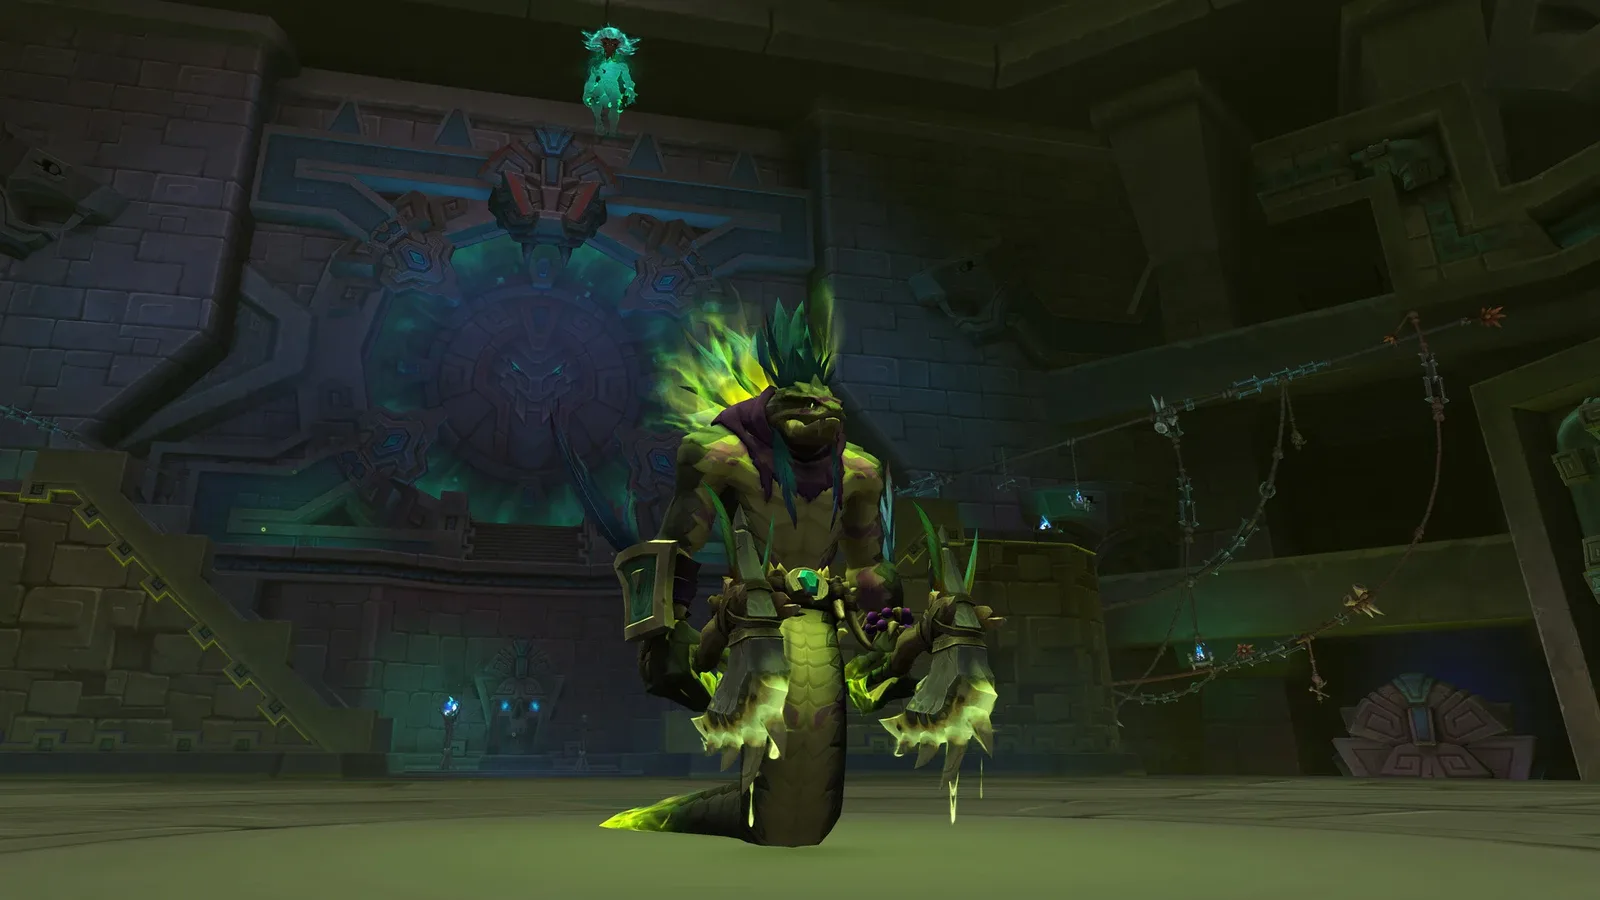
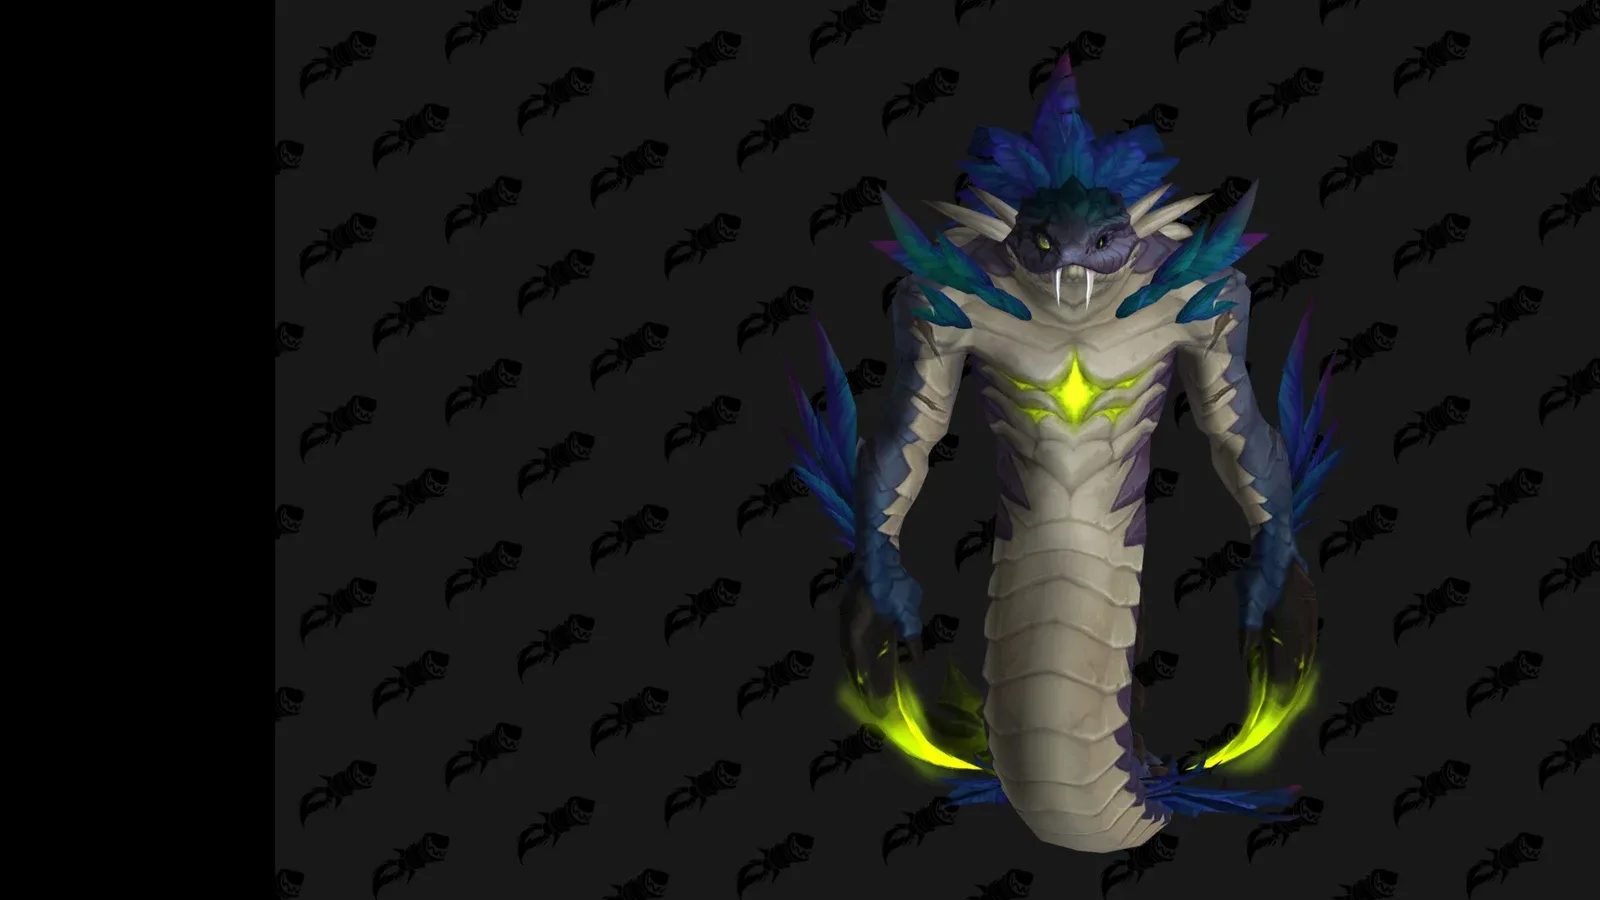
Cover: authentic game model of Sszorak, viewed in Wowhead’s 3D viewer; © Blizzard Entertainment. This is a model reference, not a combat screenshot. Spell icons are Blizzard game assets, identified through the linked Wowhead records.
Ability names below are searchable English references. Open the linked Wowhead spell for its database entry; follow the Heroic instructions here rather than another difficulty’s default tooltip.
Mutilate — Alternate two groups of at least five; do not reuse the vulnerable group.
Ravage — Face away from the raid and exchange tanks for the second Ravage.
Viscous Cyst — Place opposite the indicated wind source; keep it intact until the planned gale.
Raging Crosswinds — Find an opposing-direction partner before launch; align the airborne meeting.
Caustic Claws — Dodge impacts and keep the resulting pools away from the saved cysts.
T = tank; H = healer; R = assigned player/group. Arrows show movement or sequence; dots represent players or objects as described in the caption. Schematic, not to scale or a map of the actual arena. English labels match the linked abilities.
At the pull and after each intermission, inspect the active wind tunnels. Their one, two or three motes indicate the gale order. The wind pushes away from its source, so mark the opposite side of the platform for the corresponding Viscous Cyst. Name the positions in order instead of calling every drop simply “outside”.
Assign someone to read the sequence and give Venomous Surge targets specific drop locations. Keep one cyst at each required location rather than stacking them together. Name a caller and a backup to trigger them during the wind sequence. A spare cyst is useful only if everyone knows where it is and does not consume it accidentally.
The combo contains two Ravage, two Mutilate and one Tempest in a varying order. Taunts work during Apex Predator, so tanks must coordinate the current cast and orientation, not follow a memorised left-right dance.
| Cast | Required response |
|---|---|
| Ravage | Point away from the raid, use tank mitigation and exchange so one tank does not take both Ravage casts with the vulnerability. |
| Mutilate | Aim at the assigned soak group. At least five players must be struck; group one takes the first and group two the second. |
| Tempest | Avoid the moving tornadoes and preserve room for the next cone. |
On Heroic, Mutilated Gash leaves damage over time and increases damage from another Mutilate. Do not reuse a group still carrying that vulnerability. Keep named replacements for dead or unavailable soakers; a five-person assignment becomes underfilled when one member runs out with another mechanic.
Tanks should plan to take one Ravage and one Mutilate each while also watching Corroding Venom stacks. Announce the cast, taunt and facing change. Nobody should discover that the tank has turned Ravage by stepping into what they assumed was the shared cone.
Diagram · Mutilate
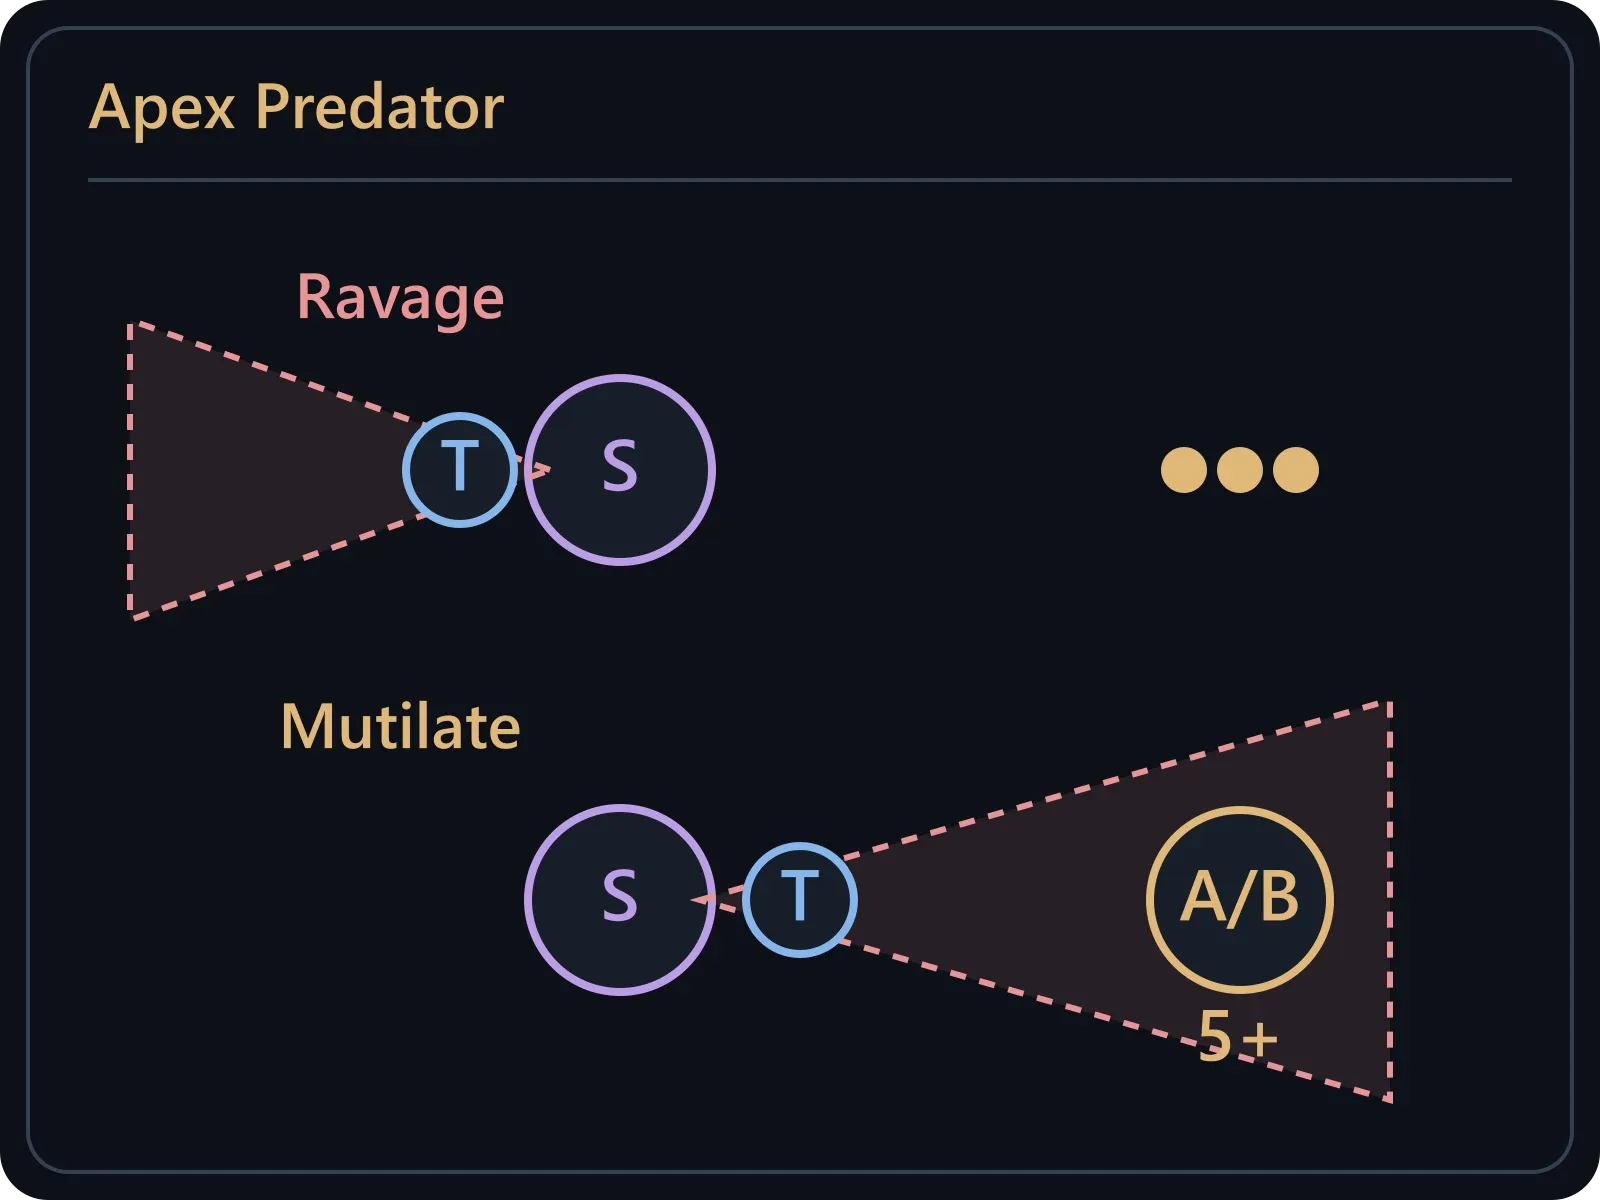
S = Sszorak. Ravage faces away from the raid; Mutilate points into the assigned five-plus group. These are facing examples, not a fixed combo order. Alternate two groups of at least five; do not reuse the vulnerable group.
Venomous Surge expires into raid damage that decreases with distance, then leaves a cyst. Move to the assigned location away from the group before it resolves. A correct drop must both reduce that hit and serve the later wind path.
During Heroic Caustic Claws, dodge impacts and leave Caustic Residue pools. Tanks move the boss into clean working space away from the cyst markers, so melee and normal movement do not set them off. Do not place a new cyst on top of another or use its position as a shortcut.
Touching a cyst, or letting it expire, causes a damaging knockback and applies toxin that helps players resist wind. That is useful at the planned moment and disruptive beforehand. If a cyst is popped early, call its location immediately; quietly hoping another player supplied a replacement leaves the raid following a broken plan.
For Raging Crosswinds, affected players separate for the initial burst and find a partner with an opposing launch direction. Align so your airborne paths meet. Contact between players carrying Turbulent Gusts removes the floating effect, letting both return to the platform.
Choose the partner before the launch rather than chasing someone while drifting toward the edge. A personal immunity that prevents your own launch can strand the player relying on you. Agree on any such alternative first. Unaffected players should leave space for the pair's approach instead of occupying their planned path.
Regroup tightly in the centre for Howling Maelstrom. Follow the announced tunnel order. Let the active gale move the stack toward its prepared cyst, then trigger it with the group positioned on the centre-facing side. The knockback should send players toward the centre, and the toxin helps resist the remaining push. Standing beyond the cyst reverses that useful geometry.
Diagram · Howling Maelstrom
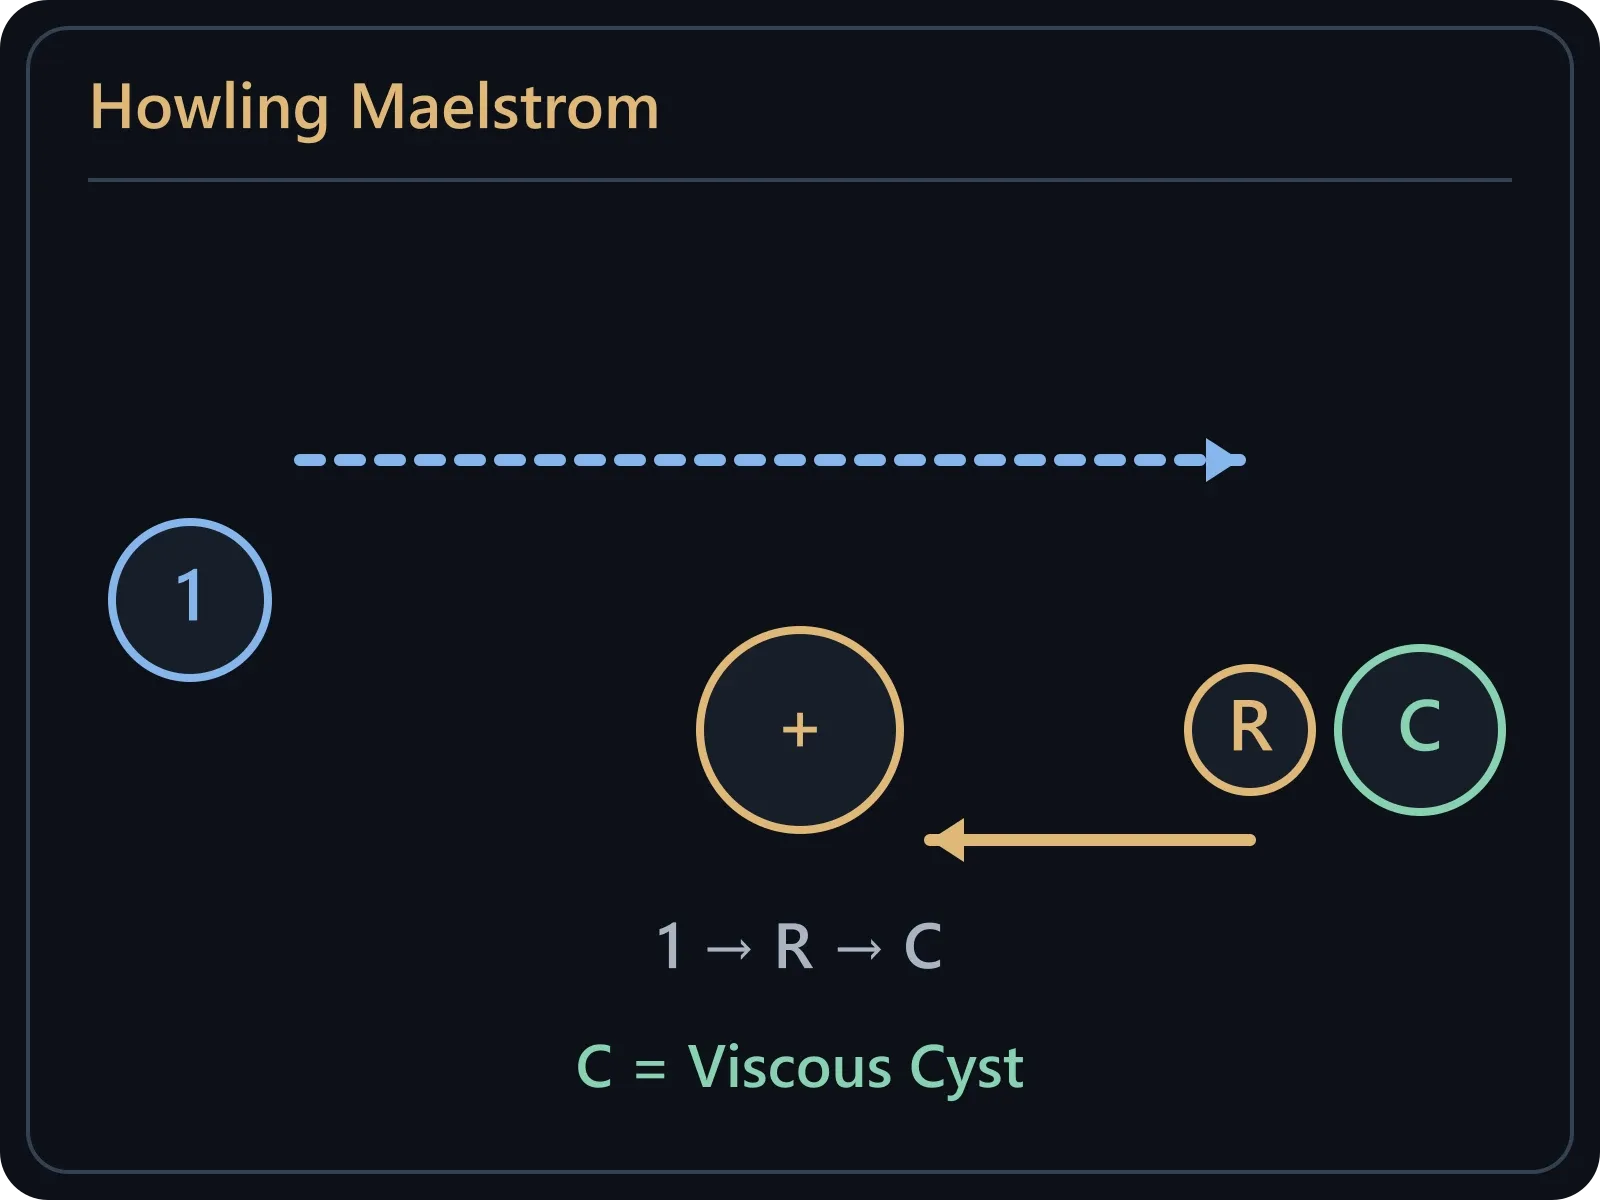
Example for wind source 1: place C opposite the source, then R stands on the centre-facing side of C. The gold arrow is the inward knockback; preserve C until needed.
Repeat for the three gales without spreading into separate travel lines. Healers plan for cyst damage and the continuing Ula'tek's Presence while the group is displaced. Use defensives before forced movement leaves healing awkward, not only after health has collapsed.
Dig In increases boss damage taken by 30% for 25 seconds. Align damage cooldowns with it when the raid can execute the movement reliably. Bloodlust/Heroism on the pull remains a reasonable starting plan; moving it into the intermission is a deliberate damage choice, not a reason to sacrifice positioning.
After the wind sequence, organise cleanup of the spare cyst with the group safely positioned, then read the next tunnel order. Do not leave a forgotten expiry to interrupt the next combo.
When someone falls, first ask whether the correct cyst existed, whether it survived until use, and whether the group was on its centre-facing side. Those are three different fixes. For a combo death, check the actual cast, orientation and soak attendance. For a Crosswinds loss, check the partner's launch and any immunity used. A short correction with an owner is more useful than asking everyone to “move better”.
Smaller Blood Venom pools affect Heroic and Mythic. Other November 5 raid nerfs have narrower scope. Check the exact mode before changing your next pull.
Blizzard lists three level-60 Forever raids for December 9. Compare the 10/20/40-player formats and prepare each player’s Onyxia entry before booking a run.
Prepare a better Midnight raid night: choose a realistic goal, cover boss jobs and backups, brief clearly, and turn wipe reviews into one useful change.